The Craftsman LT1500 Manual is a comprehensive guide designed to help users understand and maintain their lawn tractor effectively. It covers safety, operation, assembly, and maintenance procedures, ensuring proper functionality and longevity.
1.1 Overview of the Manual
The Craftsman LT1500 Manual provides a detailed guide for understanding and operating the lawn tractor. It covers essential topics such as safety precautions, assembly instructions, and maintenance schedules. The manual includes step-by-step directions for proper usage, troubleshooting common issues, and replacing parts. Users can find comprehensive diagrams and illustrations to aid in repairs and assembly. Additionally, it emphasizes the importance of following safety rules to ensure secure operation. This manual is designed to be user-friendly, offering clear instructions for both novice and experienced users. By following the guidelines outlined, users can maximize the performance and longevity of their Craftsman LT1500 lawn tractor.

1.2 Importance of Reading the Manual
Reading the Craftsman LT1500 Manual is essential for safe and effective operation of the lawn tractor. It provides critical information on safety precautions, proper usage, and maintenance, ensuring users understand how to operate the equipment correctly. The manual also helps users identify potential hazards and avoid accidents by following guidelines. By reviewing the manual, users can familiarize themselves with the tractor’s features, controls, and functions, maximizing its performance. Additionally, it includes troubleshooting tips and maintenance schedules to prolong the lifespan of the tractor. Understanding the manual prevents misuse and ensures compliance with warranty terms. It serves as a valuable resource for both novice and experienced users, offering comprehensive support for optimal functionality and safety.

Key Features and Specifications of the Craftsman LT1500
The Craftsman LT1500 features a powerful front-engine design with an electric start, automatic transmission, and a durable mower deck. It offers versatile cutting options and adjustable settings.
2.1 Engine and Transmission Details
The Craftsman LT1500 is equipped with a reliable front-engine design, featuring an electric start for effortless ignition. The engine is paired with an automatic transmission, allowing smooth and intuitive speed adjustments. Designed for efficiency, the tractor delivers consistent power for cutting and towing tasks. The automatic transmission eliminates the need for manual gear shifting, making operation easier, especially for novice users. With a robust engine and seamless transmission system, the LT1500 ensures optimal performance for various lawn care needs. Proper maintenance of these components is essential for longevity and reliability, as outlined in the manual.
2.2 Mower Deck and Cutting Options
The Craftsman LT1500 features a durable 42-inch mower deck, designed for efficient cutting and versatility. The deck is constructed with reinforced steel to withstand rigorous use and varying lawn conditions. It offers adjustable cutting heights, allowing users to tailor the mowing experience to their lawn’s needs. The deck also supports mulching, bagging, and side discharge options, providing flexibility for different cutting preferences. A washout port is included for easy cleaning, ensuring optimal performance and preventing grass buildup. The manual details how to engage the mower deck and adjust its settings for precise cutting results. These features make the LT1500 ideal for maintaining a well-manicured lawn with minimal effort.

Safety Precautions and Operating Instructions
Always wear protective gear and follow safety guidelines to ensure safe operation. Keep loose clothing tied back and avoid operating near children or pets. Maintain a safe distance from obstacles and slopes to prevent accidents. Properly inspect the machine before use and ensure all guards are in place. Familiarize yourself with controls and operate at a steady pace. Never leave the machine unattended while it is running. Stay alert and aware of your surroundings to ensure a safe mowing experience. Adhere to all safety precautions outlined in the manual to minimize risks and maintain optimal performance.
3.1 General Safety Rules
Always prioritize safety when operating the Craftsman LT1500. Wear protective gear, including gloves, safety glasses, and sturdy footwear, to minimize injury risks. Ensure loose clothing and jewelry are secure to avoid entanglement. Keep children and pets at a safe distance while mowing. Never operate the mower on slopes or uneven terrain, as this can lead to loss of control. Avoid mowing in wet conditions, as this increases the risk of slipping or electrical hazards. Familiarize yourself with controls and ensure all guards and shields are properly installed. Never leave the mower unattended while it is running. Follow all safety guidelines provided in the manual to ensure safe and efficient operation of the Craftsman LT1500. Stay alert and aware of your surroundings at all times.
3.2 Pre-Operation Checks
Before starting the Craftsman LT1500, perform a thorough pre-operation inspection to ensure safe and effective operation. Check the oil and fuel levels, ensuring they are at the recommended levels. Inspect the mower deck for damage or obstructions and verify that all bolts and nuts are tightened. Check the tire pressure and adjust it according to the specifications in the manual. Examine the blades for sharpness and balance, as dull or unbalanced blades can affect performance. Test all controls, such as the steering, brakes, and throttle, to ensure they function properly. Clear the mowing area of debris, toys, or obstacles that could interfere with operation. Lastly, confirm that all safety features, such as the operator-presence control, are working correctly. A thorough pre-operation check helps prevent accidents and ensures optimal performance.
Assembly and Installation Guidelines
Follow detailed steps for assembling the Craftsman LT1500, ensuring all parts are properly aligned and securely fastened. Refer to torque specifications and installation diagrams for accuracy.
4.1 Unpacking and Inventory
Begin by carefully unpacking the Craftsman LT1500 from its shipping box. Inspect all components for damage and verify the completeness of the shipment. Use the provided inventory list in the manual to ensure no parts are missing. Organize the hardware, such as bolts, nuts, and washers, by type and size to prevent misplacement. Store small parts in labeled containers for easy access during assembly. Check for any additional accessories or attachments included with the tractor. If any items are damaged or missing, contact customer support immediately. Proper organization and verification at this stage will streamline the assembly process and reduce the risk of delays.
4.2 Step-by-Step Assembly Process
Start by attaching the mower deck to the tractor using the provided hardware. Align the deck with the tractor’s frame and secure it with the bolts. Next, install the seat and steering wheel, ensuring they are tightly fastened. Attach the front wheels by aligning the hubs with the axle and securing them with the supplied nuts. Connect the throttle and brake cables to their respective controls, making sure they are properly adjusted. Finally, attach any additional accessories, such as the bagger or mulch kit, following the manual’s instructions. Double-check all bolts and connections for tightness before use. Refer to the parts diagram for visual guidance during assembly.

Operating the Craftsman LT1500
Start the engine, engage the mower deck, and adjust speed using the hydrostatic transmission. Use the steering wheel and foot pedals to control direction and speed. Refer to the manual for detailed operating instructions.
5.1 Starting and Stopping the Engine
To start the engine, ensure the parking brake is engaged and the mower deck is disengaged. Turn the key to the “Start” position and allow the engine to warm up briefly. For stopping, disengage the mower deck, move the throttle to the “Slow” position, and turn the key to “Off.” Always allow the engine to cool before restarting. Refer to the manual for specific starting and stopping procedures to ensure safe operation. Proper engine management extends the lifespan of your Craftsman LT1500 and prevents potential damage.
5.2 Basic Operating Controls
The Craftsman LT1500 features intuitive controls designed for ease of use. The steering wheel provides smooth directional control, while the foot pedals manage acceleration, braking, and reversing. The throttle lever adjusts engine speed, allowing you to customize power for different tasks. The mower deck engagement lever activates the cutting blades, and the height adjustment knob sets the mowing height. Familiarize yourself with these controls to ensure precise operation. Proper use of these controls enhances mowing efficiency and safety. Always refer to the manual for detailed instructions on operating the controls effectively.

Maintenance and Troubleshooting
Regular maintenance ensures optimal performance and longevity of your Craftsman LT1500. Troubleshooting common issues helps resolve problems quickly. Refer to the manual for detailed guidance.
6.1 Regular Maintenance Schedule
Regular maintenance is essential to keep your Craftsman LT1500 running smoothly. Check the engine oil level before each use and change it every 50 hours of operation. Use SAE 30 or 10W-30 oil for optimal performance. Inspect the tire pressure weekly and maintain the recommended levels specified in the manual. Sharpen the mower blade every 25 hours to ensure clean cuts and prevent deck damage. Clean the mower deck regularly to remove debris. Check the air filter every 25 hours and clean or replace it as needed. Lubricate moving parts periodically to reduce friction and wear. Following this schedule ensures reliability, performance, and extends the lifespan of your tractor.
6.2 Common Issues and Solutions
If the engine fails to start, check the fuel level, oil level, and ignition system. Ensure the choke is in the correct position and the air filter is clean. For poor cutting performance, inspect the mower blade for sharpness and balance. Clean the mower deck to ensure proper airflow. If the transmission is slipping, check the belt tension and adjust or replace it as needed. Lubricate the transmission periodically to maintain smooth operation. For uneven cutting, level the mower deck and ensure proper tire pressure. If issues persist, consult the manual or contact customer support for professional assistance. Regular maintenance can prevent many of these problems and keep your tractor running efficiently.

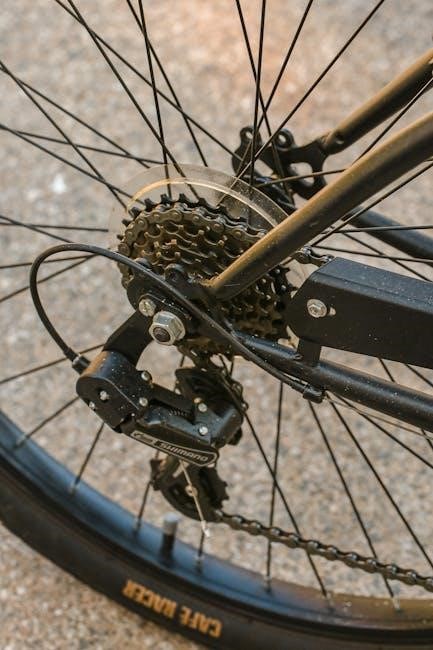
Parts Diagram and Replacement
The parts diagram provides a detailed visual guide for identifying components. Always use authentic Craftsman replacement parts to ensure compatibility and maintain warranty validity. Follow the manual’s instructions for proper installation using recommended tools to guarantee safety and performance.
7.1 Understanding the Parts Diagram
The parts diagram in the Craftsman LT1500 manual is a visual representation of all components, enabling easy identification and location. It is organized by major assemblies, such as the engine, mower deck, and transmission, with numbered or labeled parts corresponding to descriptions in the manual. This tool is essential for diagnosing issues, ordering replacement parts, and performing repairs accurately. Users should familiarize themselves with the diagram to understand how components interact and where they are situated. Properly interpreting the diagram ensures correct part selection and installation, minimizing errors during maintenance or repairs. Always refer to the diagram before servicing the tractor to avoid misunderstandings and ensure safety.
7.2 Ordering and Replacing Parts
To order replacement parts for the Craftsman LT1500, refer to the parts diagram in section 7.1 to identify the correct part number. Visit the official Craftsman website or authorized dealers to ensure genuine parts. When replacing parts, follow the manual’s instructions carefully to avoid damage or injury. Shut off the engine, engage the parking brake, and disconnect the spark plug before starting any repair. Use tools as specified, and wear protective gear. If unsure, consult a professional. Proper installation ensures safety and optimal performance. Always double-check part compatibility before purchasing to avoid delays or incorrect installations.

Accessories and Attachments
The Craftsman LT1500 supports various accessories to enhance functionality, such as baggers, mulch kits, and tow-behind carts. These attachments expand the tractor’s versatility for yard maintenance.
8.1 Compatible Accessories
The Craftsman LT1500 is compatible with a variety of accessories designed to enhance its functionality. These include baggers for efficient leaf and debris collection, mulch kits to improve lawn health, and tow-behind carts for increased storage capacity. Additionally, snow plows and utility carts can be attached, making the tractor versatile for seasonal tasks. All accessories are specifically designed to fit the LT1500’s specifications, ensuring seamless integration and optimal performance. For the best experience, it is recommended to purchase accessories from authorized Craftsman dealers or official online retailers to ensure compatibility and warranty coverage.
8.2 Installing Attachments
Installing attachments on the Craftsman LT1500 is a straightforward process when done correctly. Always start by ensuring the tractor is on level ground and the engine is turned off. Remove any obstacles and engage the parking brake for safety. Refer to the specific attachment’s instructions for compatibility and mounting points. Align the attachment with the tractor’s hitch or mounting brackets, securing it with the provided hardware. Tighten all bolts firmly to prevent movement during operation. Double-check the attachment’s position and stability before starting the engine. Test the attachment at a slow speed to ensure proper function and make adjustments as needed. Always follow safety guidelines to avoid accidents or damage to the equipment.

Warranty and Customer Support
This section provides essential details about the warranty coverage for the Craftsman LT1500, including duration and scope. It also outlines customer support options for assistance.
9.1 Warranty Coverage Details
The Craftsman LT1500 is backed by a limited warranty that covers defects in materials and workmanship. The warranty typically lasts for 2 to 5 years, depending on the component. It includes coverage for the engine, transmission, and mower deck under normal residential use. Wear and tear, misuse, or improper maintenance are excluded. For detailed terms, refer to the manual. The warranty is transferable if the unit is sold, provided the new owner registers the product. Always retain the original purchase receipt as proof of ownership. This section ensures peace of mind for users, knowing their investment is protected against manufacturing defects.
9.2 Contacting Customer Service
To contact Craftsman customer service for inquiries or support regarding the LT1500, visit their official website at craftsman.com. You can access the “Support” section to find a contact form, live chat option, or phone number. For direct assistance, call 1-888-331-4569 (available Monday–Saturday, 7 AM–7 PM ET). Representatives are available to address questions, troubleshooting, or warranty claims. Online resources, such as FAQs and troubleshooting guides, are also accessible to help resolve common issues quickly. For faster service, have your model number (LT1500) and serial number ready when contacting support. This ensures a smooth and efficient experience in resolving any concerns.