Marie Callender’s Chicken Pot Pie is a comforting classic, offering a flaky crust filled with tender chicken, vegetables, and creamy sauce․ Perfect for a convenient, satisfying meal․
Overview of the Dish
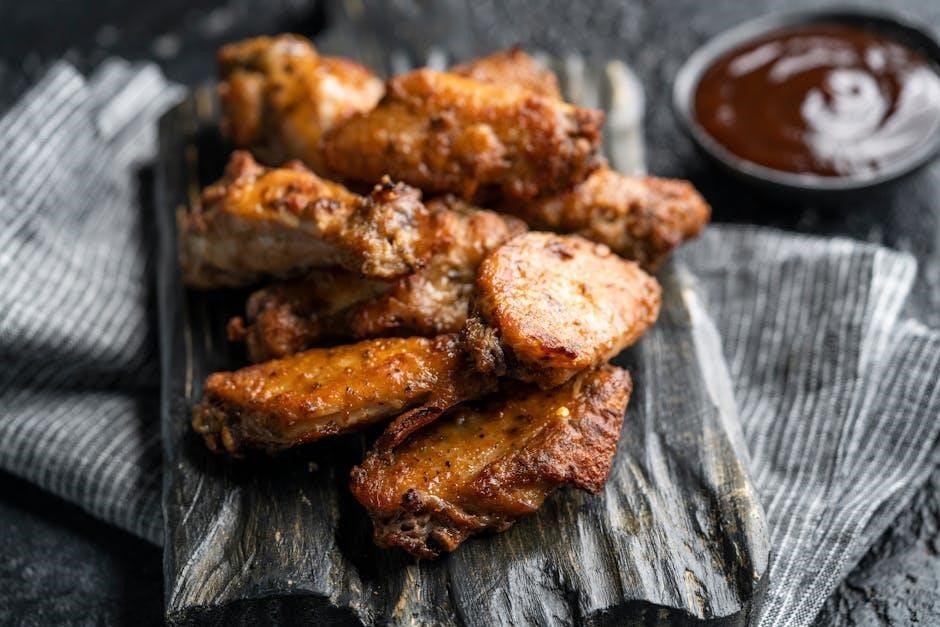
Marie Callender’s Chicken Pot Pie is a beloved comfort food featuring tender chicken, mixed vegetables, and a rich, creamy sauce, all encased in a golden, flaky crust․ It’s a satisfying meal that combines hearty flavors with a homemade touch, perfect for cozy dinners or quick lunches․ The dish balances savory and comforting elements, making it a timeless favorite for many․
Popularity and Convenience
Marie Callender’s Chicken Pot Pie is a crowd favorite, praised for its comforting, homemade taste and hassle-free preparation․ Its popularity stems from the perfect balance of flavor and convenience, making it a go-to option for quick, satisfying meals․ Available in various sizes, it caters to both individual and family needs, offering a delicious, stress-free dining experience without compromising on quality or taste․
Safety First: Precautions and Allergens
Marie Callender’s Chicken Pot Pie contains common allergens like milk and soy․ Always check the packaging for allergen warnings and follow safe handling practices to avoid cross-contamination․
Common Allergens in the Pot Pie
Marie Callender’s Chicken Pot Pie contains milk and soy, common allergens․ The creamy filling includes dairy, and some ingredients may contain soy․ Always check the packaging for allergen warnings and review the ingredient list to ensure safety for those with dietary restrictions․ Severe reactions can occur if proper precautions are not taken, so mindful consumption is essential for allergic individuals․
Important Safety Tips for Preparation
Always remove the pot pie from its packaging, including the plastic cover and tin foil, before cooking․ Place it on a baking sheet to catch any spills․ Never cook the pie in its packaging, as it can cause uneven heating or damage․ Ensure the pie is fully cooked to an internal temperature of 165°F to avoid foodborne illness․ Follow these steps to enjoy a safe and satisfying meal․
Oven Preparation Guidelines
Preheat the oven to 375°F (190°C)․ Place the pot pie on a baking sheet to catch spills․ Bake until the crust is golden and filling bubbles․
Preheating the Oven
Preheating your oven to 375°F (190°C) is essential for achieving a golden, flaky crust․ Ensure the oven is fully preheated before placing the pot pie inside to avoid a soggy texture․ This step ensures even cooking and helps the filling heat through properly while the crust browns beautifully, enhancing the overall flavor and presentation of the dish․
Removing Packaging and Placing on Baking Sheet
Start by carefully removing the pot pie from its packaging, including the plastic wrap and any tin foil covering the pie plate․ Place the pie on a baking sheet lined with aluminum foil to catch any spills or drips during cooking․ This step ensures a clean and mess-free cooking process while helping the crust cook evenly․ Proper placement is key for optimal results․
Baking Instructions for a Golden Crust
Preheat your oven to 400°F (200°C)․ Place the pie on a baking sheet to catch any drips․ Bake for 60-70 minutes, or until the crust is golden brown and the filling is bubbling․ Avoid opening the oven too early, as this can affect the crust’s rise․ Let it cool slightly before serving to ensure a perfectly cooked, golden-brown crust every time․

Microwave Cooking Method
Microwave Marie Callender’s Chicken Pot Pie on high for 3-4 minutes for a 10-ounce pie, adjusting for larger sizes․ Remove packaging, cook until crust is golden, check halfway to prevent burning, and let stand before serving․
Step-by-Step Microwave Instructions
- Remove the pot pie from its packaging, including the plastic cover and tin foil plate if applicable․
- Place the pie on a microwave-safe plate to prevent spills and ensure even cooking․
- Cook on high for 3-4 minutes for a 10-ounce pie, adjusting time for larger sizes as needed․
- Check the pie halfway through cooking to avoid overcooking the crust or filling․
- Let the pie stand for 1-2 minutes before serving to allow the filling to set and crust to stabilize․
This method ensures a quick, evenly cooked meal with a golden, flaky crust and hot, creamy filling․
Achieving the Perfect Consistency
Achieving the Perfect Consistency
To ensure the filling is smooth and the crust is flaky, cook the pot pie in short intervals․ For a 10-ounce pie, microwave on high for 3-4 minutes, then check consistency․ If undercooked, cook in 30-second increments until hot and bubbly․ Avoid overcooking to prevent a runny texture․ Let it stand for 1-2 minutes to allow filling to thicken slightly before serving․
Air Fryer Alternative
Cook Marie Callender’s Chicken Pot Pie in an air fryer at 350°F for 40 minutes․ This method yields a crispy crust without oven use, ensuring even cooking and a golden finish․
Cooking Time and Temperature
Cook Marie Callender’s Chicken Pot Pie in the air fryer at 350°F for 40 minutes․ This method ensures a crispy, golden crust without needing an oven․ Preheating the air fryer is optional but recommended for even cooking․ The pot pie will be ready when the crust is golden brown, and the filling is hot and bubbly․ Adjust time slightly if using a smaller or larger pot pie size․
Benefits of Using an Air Fryer
Cooking Marie Callender’s Chicken Pot Pie in an air fryer offers faster results with less oil, yielding a crispy crust․ It’s a healthier alternative to deep-frying and requires less energy than oven cooking․ The air fryer ensures even heating, preventing sogginess and promoting a golden-brown finish․ This method is ideal for achieving restaurant-quality results at home with minimal effort and cleanup․

Crust Perfection: Tips and Tricks
Thaw the crust slightly for easier handling․ Poke the bottom with a fork to prevent air bubbles․ Brush with egg wash for a golden finish․
Handling Store-Bought Crust
For store-bought crust, thaw slightly before use․ Gently roll out on a floured surface to fit your dish․ Poke the bottom with a fork to prevent bubbles․ Trim excess dough, crimp edges for a seal․ Brush with egg wash for a golden finish․ These steps ensure a flaky, perfectly cooked crust for your Marie Callender’s Chicken Pot Pie․
Homemade Crust Alternatives
For a homemade touch, make a flaky crust from scratch using flour, butter, and water․ Alternatively, use puff pastry for a buttery texture․ Pre-made pie dough is another quick option․ Blind baking the crust before adding filling ensures crispness․ These alternatives offer flexibility while maintaining the dish’s signature flavor and texture, perfect for customizing your Marie Callender’s Chicken Pot Pie experience at home․
Dietary Considerations
Marie Callender’s Chicken Pot Pie contains common allergens like milk and soy․ Always check the label for specific dietary needs and allergen information before consumption․
Adapting the Recipe for Special Diets
To accommodate special diets, substitute gluten-free flour for the crust and use dairy-free milk․ For a plant-based version, replace chicken with tofu or tempeh and skip butter․ Ensure all ingredients are allergen-free to suit dietary needs․ Adjust seasonings and thickeners as required to maintain flavor and texture․ Always verify ingredient labels for hidden allergens like soy or milk to ensure a safe and enjoyable meal for all․
Nutritional Overview
Marie Callender’s Chicken Pot Pie offers a balanced mix of protein, vegetables, and carbohydrates․ A single serving typically contains around 400-500 calories, with notable amounts of fat and sodium․ It is a good source of essential nutrients like chicken protein and vitamins from mixed vegetables․ However, it may contain allergens such as milk and soy․ Always check the nutrition label for detailed information and specific dietary needs․
Serving Suggestions
Serve Marie Callender’s Chicken Pot Pie with a fresh salad, steamed vegetables, or warm bread for a complete meal․ Add herbs or a dollop of sauce for extra flavor․
Side Dishes to Pair with the Pot Pie
Marie Callender’s Chicken Pot Pie pairs perfectly with a fresh green salad, roasted vegetables, or warm bread for a balanced meal․ Steamed broccoli or mashed potatoes also complement its rich, savory flavors․ A side of fruit or a light coleslaw can add a refreshing contrast to the hearty dish, ensuring a well-rounded dining experience․
Garnishes and Toppings
Enhance your Marie Callender’s Chicken Pot Pie with fresh parsley or thyme for a vibrant touch․ A dollop of sour cream or a sprinkle of chives adds a creamy, oniony flavor․ For extra crunch, top with crispy bacon bits or a side of flaky crust crumbs․ A light drizzle of hot sauce or a squeeze of lemon can also elevate the dish, balancing its rich, savory flavors․
Troubleshooting Common Issues
- Avoid a soggy crust by ensuring the oven is preheated and the pie is placed on a baking sheet․
- Prevent overcooking by checking for a golden crust and bubbling filling before extending bake time․
Soggy Crust Solutions
Avoid a soggy crust by ensuring the oven is preheated to the correct temperature and placing the pie on a baking sheet․ Avoid cooking the pie in its packaging, as this traps moisture․ If using a microwave, follow timing guidelines carefully to prevent undercooking․ For extra crispness, bake at a higher temperature for the last few minutes or use a pie shield to protect edges while allowing the center to crisp․ Air frying can also help achieve a golden, non-soggy crust by circulating hot air evenly around the pie․
Preventing Overcooking
To prevent overcooking, monitor the pie closely during baking․ A golden-brown crust and bubbling filling indicate it’s done․ Use a pie shield to protect edges from burning․ Avoid high oven temperatures, as they can overcook the crust before the filling is ready․ Ensure the center is heated through but not overly hot․ Let the pie rest a few minutes before serving to retain moisture and texture․
Nutritional Information
Marie Callender’s Chicken Pot Pie offers approximately 350-400 calories per serving, rich in protein, vegetables, and creamy sauce, making it a balanced yet indulgent meal option․
Calorie and Nutrient Breakdown
Marie Callender’s Chicken Pot Pie provides approximately 350-400 calories per serving, with a balance of 25-30g of protein, 25-30g of fat, and 25-30g of carbohydrates․ It is also rich in sodium, fiber, and essential vitamins from the vegetables․ The dish offers a hearty mix of nutrients, making it a satisfying meal, though moderation is recommended for those monitoring calorie or sodium intake due to its rich ingredients․
Healthier Alternatives
For a healthier twist, consider using a homemade crust with less butter or olive oil․ Substitute heavy cream with low-fat milk or Greek yogurt․ Add more vegetables like spinach or zucchini for extra fiber․ Opt for leaner chicken and low-sodium broth to reduce sodium content․ Pair the pot pie with a side salad for a balanced meal․ These adjustments make the dish nutritious while maintaining its comforting appeal․
Marie Callender’s Chicken Pot Pie offers a delicious, convenient meal with flaky crust and savory filling․ Perfect for any occasion, it satisfies cravings with minimal effort, ensuring enjoyment every time․
Final Tips for Enjoying Marie Callender’s Pot Pie
For the best experience, bake Marie Callender’s pot pie in a preheated oven at 375°F for 60-70 minutes until golden․ Let it cool slightly before serving to ensure a safe, enjoyable meal․ Pair with a fresh salad or roasted vegetables for a balanced dinner․ Always check for allergens like milk and soy to accommodate dietary needs․ Enjoy the perfect blend of flavors and textures in every bite!